Video Introduction
Step-by-step guide
In this tutorial, you will walk through the basic workflow of creating your own design in Sliceform Studio.
Step 1: Starting options
The various options in the starting modal allows you to play with many different tile configuration. For now, pick the fourth option, "Octagons and squares".

Step 2: Populating the canvas
The blue panel on the right is called the "palette"; the larger white area is called the "canvas". Drag a square and an octagon out from the palette onto the canvas.
Step 3: Joining tiles
To join two tiles together, drag an edge from one tile over another. The edges should glow blue when you drag, and then turn green when they snap together.
You can break edges apart again by clicking on them.
Step 4: Canvas control
Drag the tiles to move them around the canvas; drag vertices to rotate them around.
Pan and zoom by dragging and scrolling on the canvas respectively. You can also reset the zoom level via the and 1:1 buttons on the bottom left corner of the canvas.
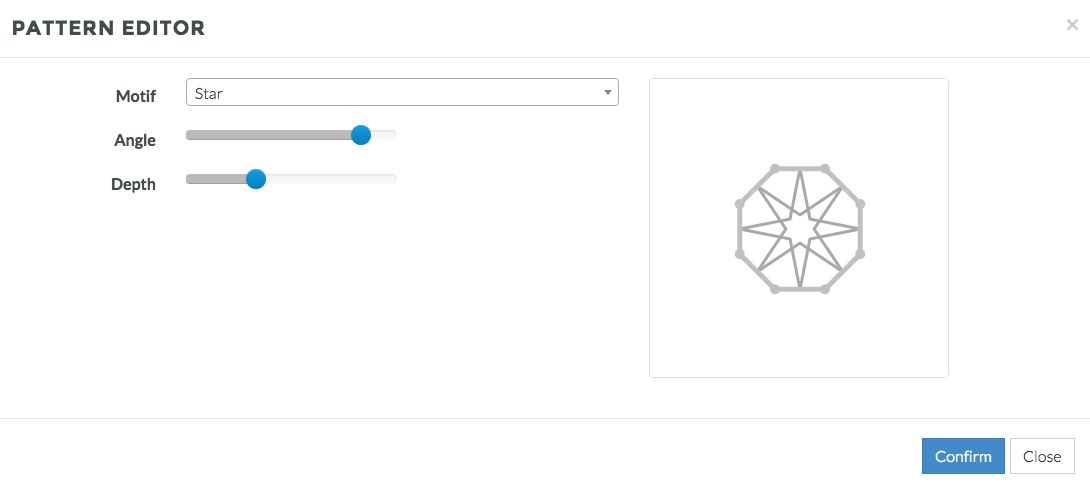
Step 5: Editing patterns
Every tile already has a pattern inscribed in it. Click the button beside each tile in the palette to launch the pattern editor.
In the pattern editor, you can select different motifs and drag sliders to change the parameters of each motif.
Step 6: Tracing strips
Click on "Trace and export strips" on the top of the page. Note that Sliceform Studio magically traces the patterns through the tiles to create interlaced strips.

Step 7: Assigning colors
Use the color picker to pick out colors. "Paint" strips with the selected color by clicking on them.

Step 8: Export image
You can export your digital design as a PNG or SVG image at the top right corner.
If you are not interested in paper assembly, you can stop here!

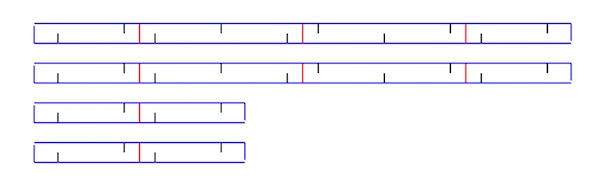
Step 9: Exporting strip templates
The strips you have painted show up in the "Export Strips" side panel on the left. Click on the button to download templates of all the strips assigned that color.
You can also drag them from a color category to another to reassign colors, or click on the icons to unassign colors.

Step 10: Physical assembly
These templates are optimized to be used for laser cutting or die cutting paper. The black lines are slits where two intersecting strips can be slotted together, while the red lines represent creases where the strip should be folded.